

A bumper sticker can say a lot about you, so getting it right matters more than people think. The truth is, there’s a big difference between one that clings smoothly for years and one that starts peeling after the first car wash. Proper technique makes all the difference, and it’s easier than most expect once you know what to do.
This guide walks you through how to apply bumper sticker graphics so they stay neat, straight, and long-lasting. You’ll see how preparation, placement, and care work together to give your sticker that professional finish.
Whether it’s your first DIY bumper decal or you’re fine-tuning your car sticker application skills, this step-by-step approach helps you achieve a finish that looks clean and stays that way.
Preparing the Surface Correctly
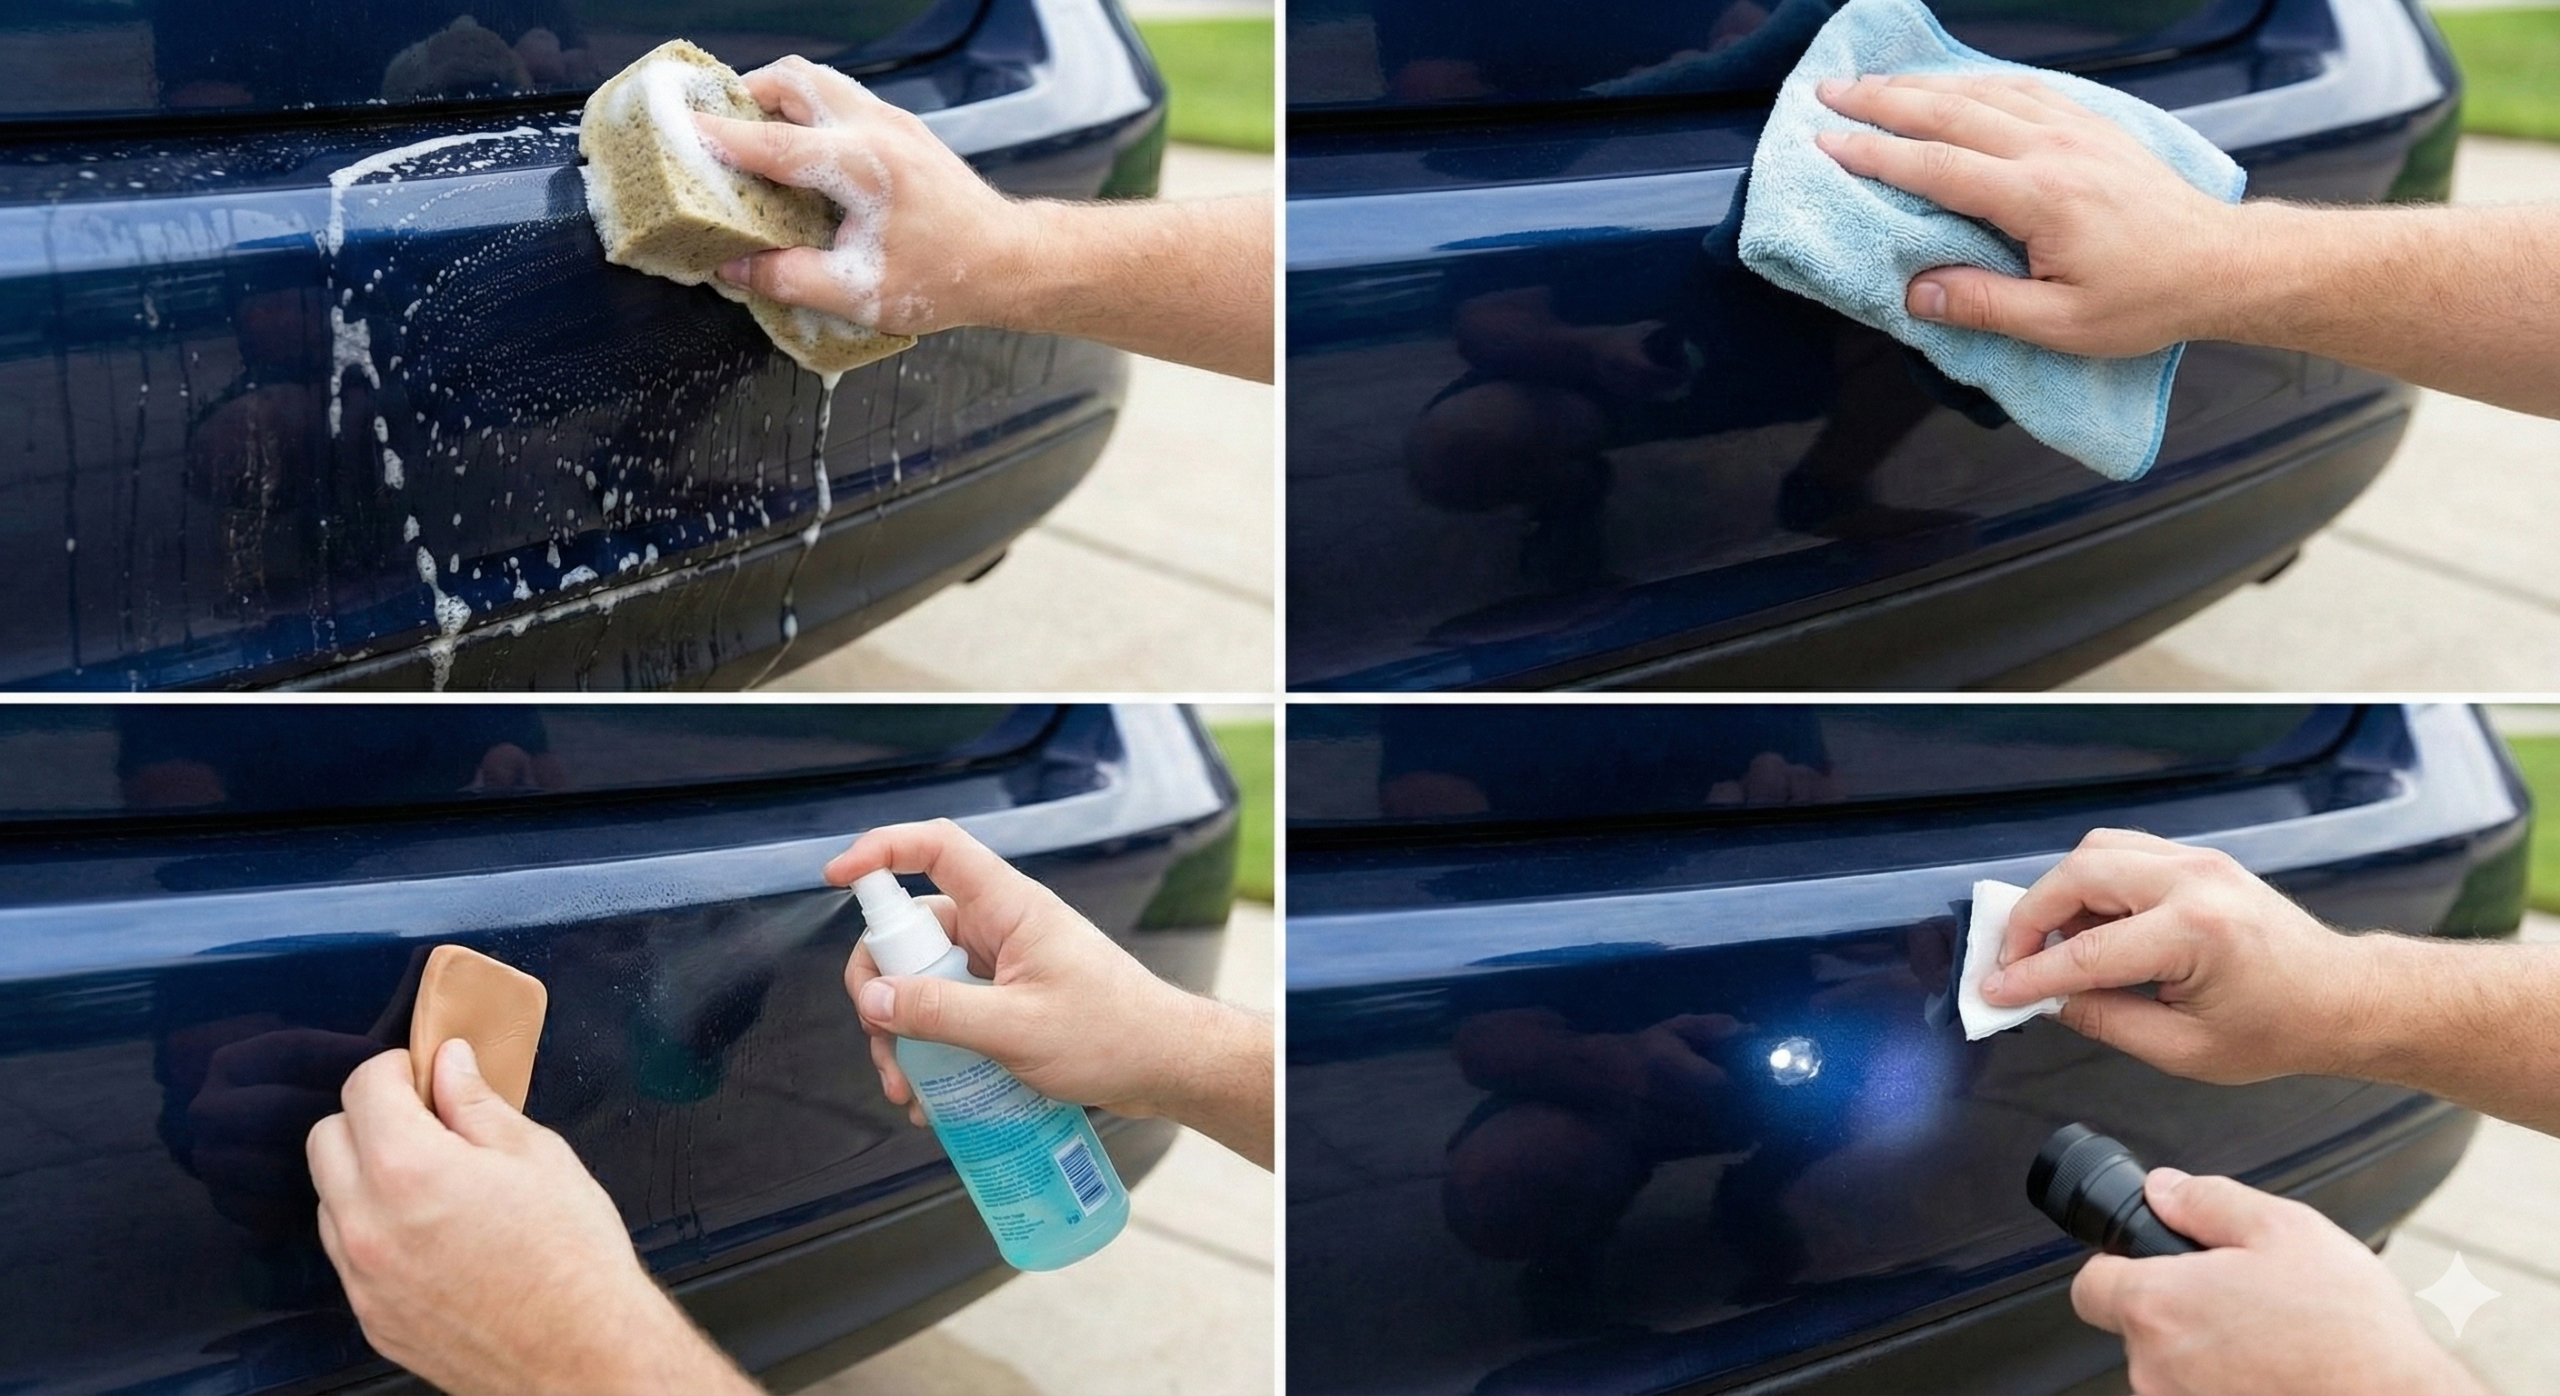
Before you start the bumper sticker application, make sure the surface is as clean as it can be. Dirt, wax, or grease stops the adhesive from sticking properly, so it’s worth giving the area some extra attention. Use warm water mixed with a mild car shampoo, then rinse thoroughly. For a final touch, wipe over the spot with rubbing alcohol to remove any remaining residue.
Once clean, dry the bumper with a lint-free cloth, paying close attention to corners or curved areas. A few stray drops of water can weaken the sticker’s grip over time. Temperature matters, too. Try to apply your sticker on a day that’s dry and mild, roughly between 15 and 25 degrees Celsius tends to give the best results.
Clean preparation is the quiet secret behind how to apply bumper sticker designs that actually last. It sets you up for a smooth, confident finish later on.
Positioning the Bumper Sticker
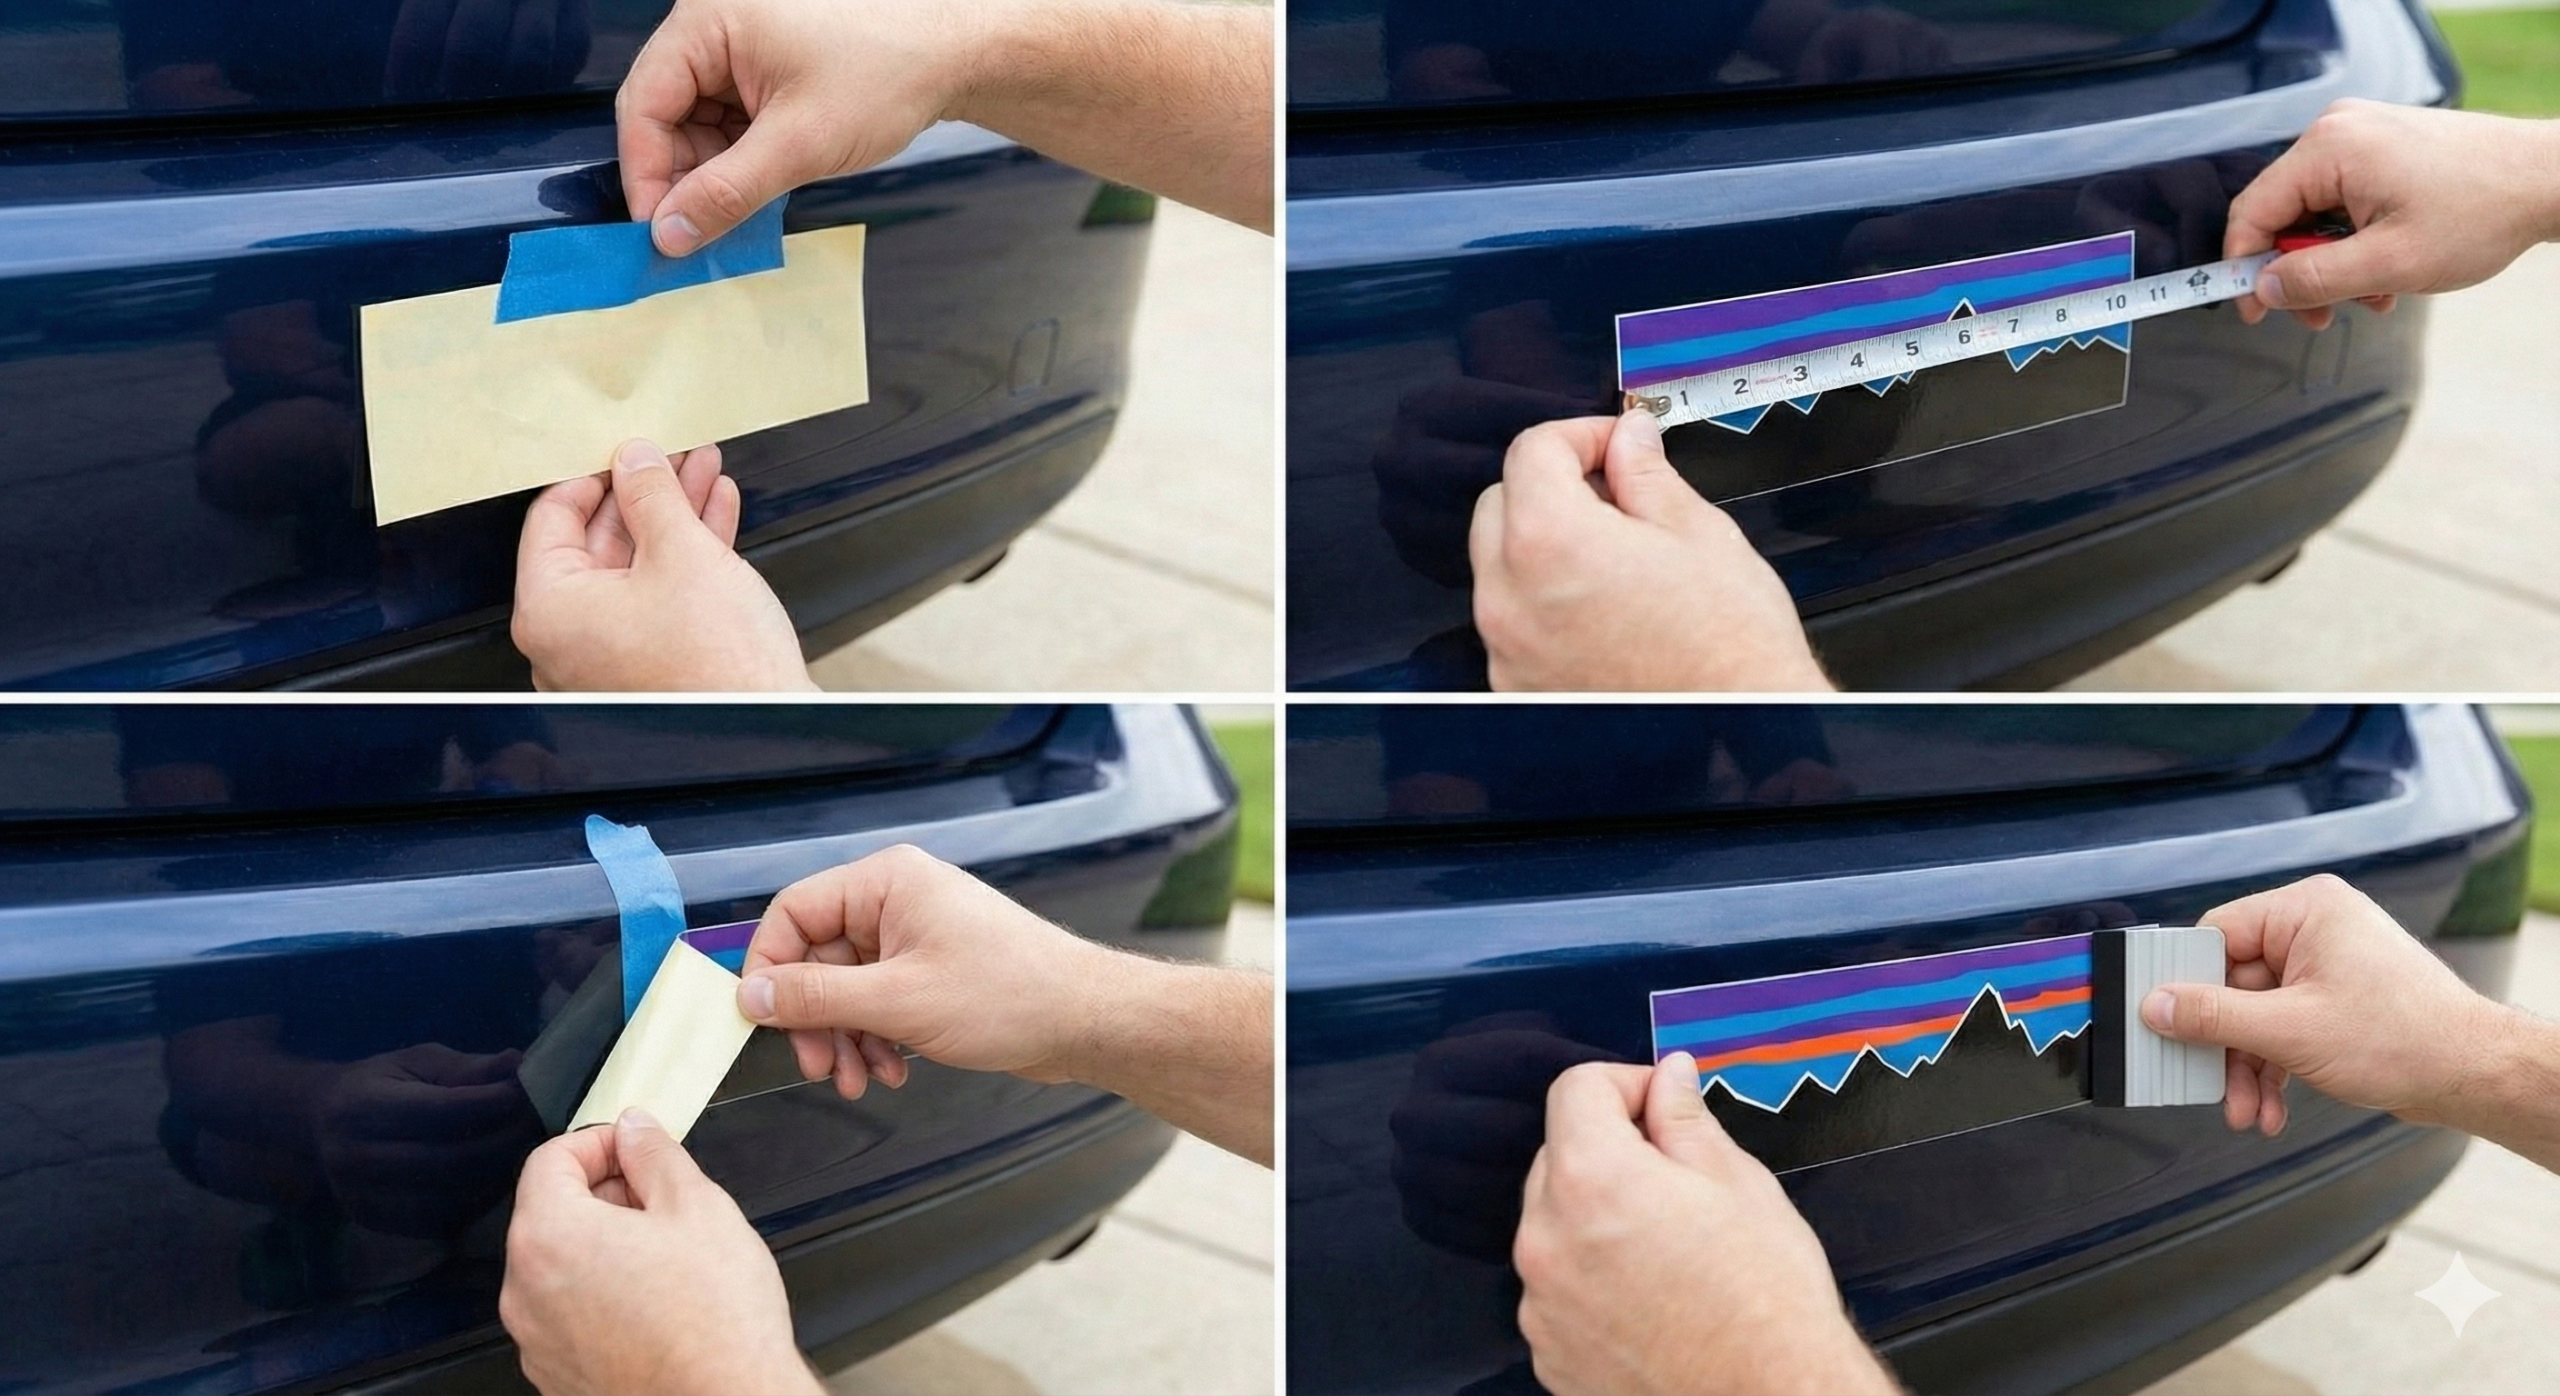
Once the surface is ready, the next step is to find the best spot for your sticker. Getting the position right saves time and frustration later. Before you apply bumper sticker designs, hold it against the bumper and step back to see how it lines up with the vehicle’s curves or body lines. This quick check helps you judge what looks balanced.
For extra accuracy, mark the position with small pieces of masking tape at the corners. The tape acts as a gentle guide when you start sticking. Some people prefer using a light pencil mark that can be wiped away after the sticker is in place. These small sticker placement tips help you avoid that crooked look that’s hard to fix once the adhesive touches the paint.
A moment spent checking alignment often leads to a finish that looks neat and deliberate.
Applying the Sticker Smoothly
Now comes the part most people rush, though it makes the biggest difference. Start by peeling one corner of the backing paper, then slowly separate a small section of the adhesive side. Keep the rest of the backing attached so you have control as you apply bumper sticker designs across the bumper.
Begin at one edge and press the exposed section firmly in place. As you move along, pull away more of the backing bit by bit, smoothing the sticker down with your hand or a soft cloth. Try to keep the sticker steady and slightly taut while pressing from the centre outward. This helps avoid creases or trapped air underneath the film.
For larger stickers, it’s sometimes easier to have another pair of hands to hold the opposite end steady. A slow, steady bumper sticker application tends to produce the cleanest finish, leaving you with a look that feels crisp and professional without needing special tools.
Removing Air Bubbles and Creases
Even with careful work, a few air bubbles may appear during your car sticker application. The good news is that they’re easy to fix if handled gently. Take a squeegee, or even a credit card wrapped in a soft cloth, and glide it firmly over the surface. Start from the centre of the sticker and push outward, easing trapped air to the nearest edge.
If you notice stubborn bubbles that refuse to move, you can pierce them lightly with a fine pin, then smooth the area again with slow, steady pressure. Avoid pushing too hard; the goal is to flatten the surface, not stretch it.
Small creases can often be lifted slightly and reapplied while the adhesive is still fresh. With patience and a light touch, your bumper sticker will settle neatly and look as if it’s been professionally fitted.
Aftercare and Long-Term Maintenance
Once your DIY bumper decal is in place, it’s best to give it a little time to settle. Avoid washing the car for at least two days after application so the adhesive can bond properly. If you do need to clean your vehicle, use a mild shampoo and a soft sponge, keeping clear of the sticker’s edges to stop them lifting.
Harsh chemicals or high-pressure washers can shorten the sticker’s life, so a gentle hand makes all the difference. Regular checks help too. If you ever notice small corners starting to peel, press them back down before dust or moisture sneaks underneath.
With light maintenance and careful cleaning, your bumper sticker should stay bright, flat, and firmly attached for a long time, a small effort that keeps your car’s personal touch looking sharp.
You’ve now seen how to apply bumper sticker designs that stay neat, smooth, and eye-catching. From cleaning the surface to removing the last air bubble, each step helps create that polished finish you’ll notice every time you walk past your car.
For those ready to personalise their vehicle, explore our full collection of high-quality decals and bumper stickers here at Demon Graphics. Every design is made for durability and style, helping you put your own mark on the road.


